Using
MessageWhiz on ![logo](/wp-content/themes/messagewhiz/images/page-instruction_using/logo.svg)
Step 1
Step One: How to create a campaign
Begin by creating a messaging workflow, which Customer.io automatically sends in response to user behavior.
1. Log into your Customer.io account.
2. Click on the Campaigns tab.
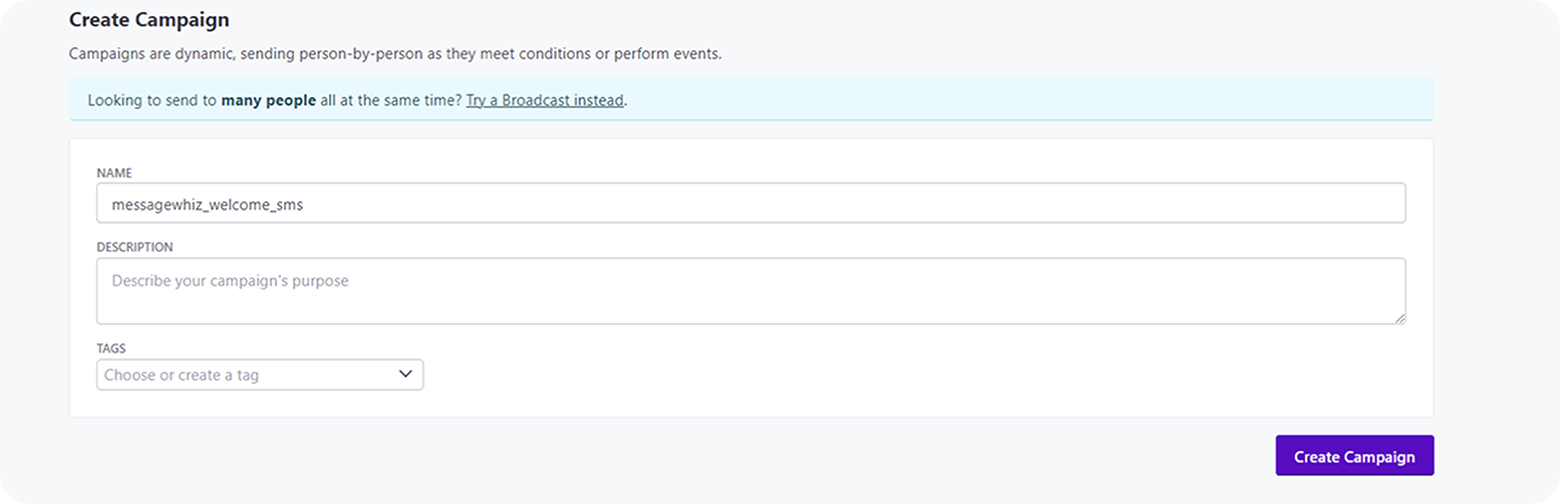
3. Click Create Campaign.
4. Enter a campaign name and click Create Campaign.
![](/wp-content/themes/messagewhiz/images/page-instruction_using/s1img1-1600.png)
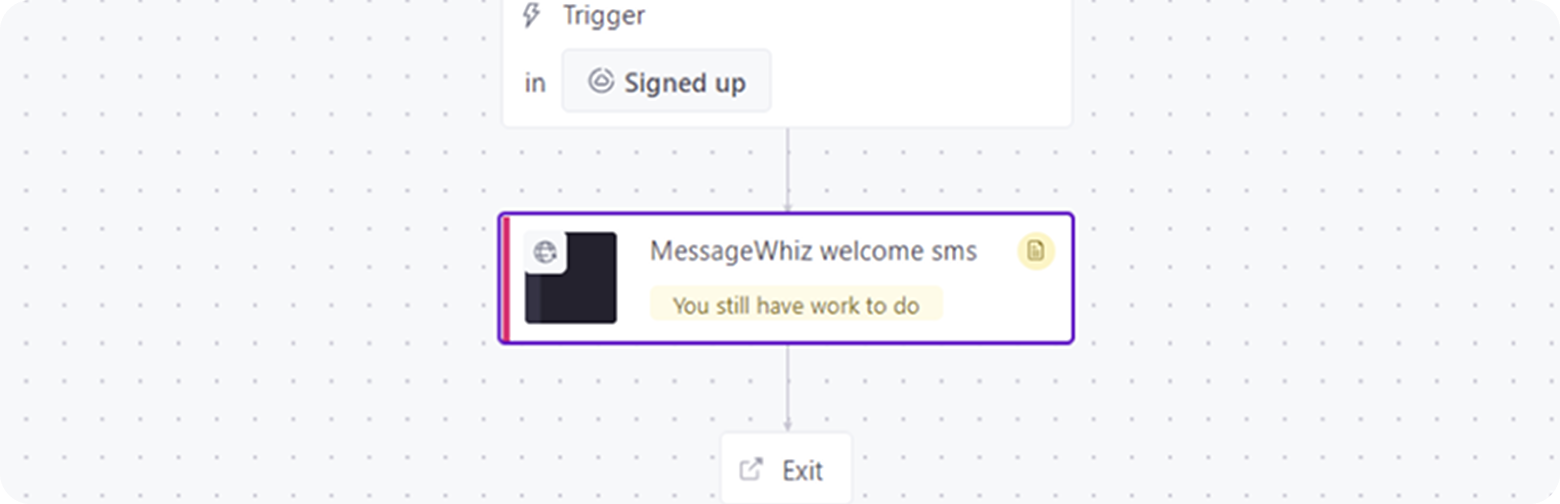
5. Select the They meet conditions trigger. Click on the trigger condition that meets the needs of your campaign.
![](/wp-content/themes/messagewhiz/images/page-instruction_using/s1img2-1600.png)
6. Choose “Send and receive data” and drag it to the middle of your workflow.
![s1img3-1600](/wp-content/themes/messagewhiz/images/page-instruction_using/s1img3-1600.png)
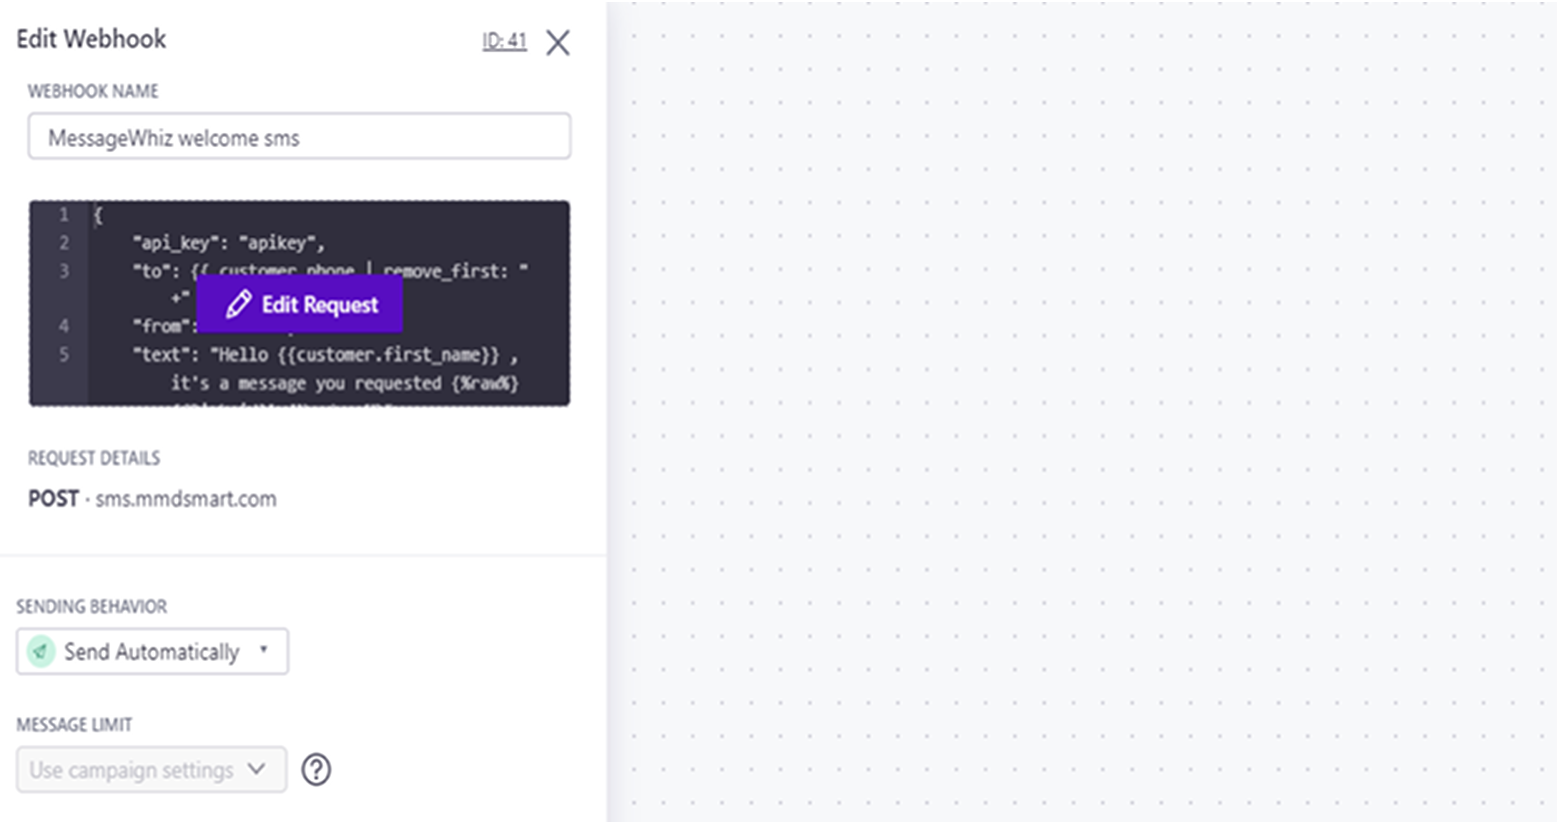
7. Select the dropped block.
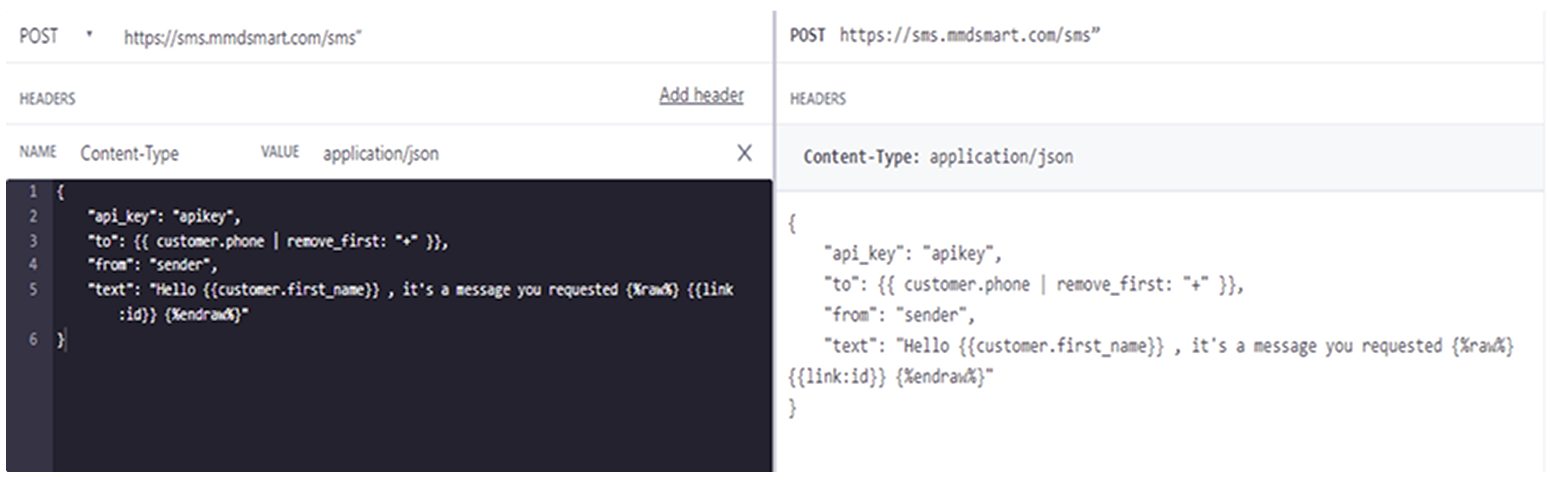
8. Click Add Request.
Set the method to POST
URL to https://sms.mmdsmart.com/sms
Keep the header Content type – application JSON.
Set the body to one of the following JSON:
If you are using MessageWhiz’s shorten_url feature, use the following request:
{ "api_key": "apikey", "to": "{{ customer.phone | remove_first: "+" }}", "from": "sender", "text": "Hello {{customer.first_name}} , it's a message you requested {%raw%} {{link:id}} {%endraw%}" }
{
"api_key": "apikey",
"to": "{{ customer.phone | remove_first: "+" }}",
"from": "sender",
"text": "Hello {{customer.first_name}} , it's a
message you requested {%raw%} {{link:id}} {%endraw%}"
}
Copy codeIf you do not need the shorten_url feature, please use the following request:
{ "api_key": "apikey", "to": "{{ customer.phone | remove_first: '+' }}", "from": "sender", "text": "Hello {{customer.first_name}},It's a message you requested" }
{
"api_key": "apikey",
"to": "{{ customer.phone | remove_first: '+' }}",
"from": "sender",
"text": "Hello {{customer.first_name}},It's a message you requested"
}
Copy code![s1img5-1600](/wp-content/themes/messagewhiz/images/page-instruction_using/s1img5-1600.png)
The following optional parameters may be included into request:
client_ref - custom parameter up to 160 characters, will be present in response for Single creation, DLR to Webhook, and callback
callback - the URL of callback to which DLR statuses per single message will be sent
Callback will contain the following parameters:
message_id – the ID of the message
sender – the Sender name that was used in message
recipient – phone number of the recipient
content – text of the message that the recipient received
state – the ID of DLR status of message
status – the DLR status of single message. Possible DLR statuses (with their ids):
1 - ENROUTE
2 -DELIVRD
3 - EXPIRED
4 - DELETED
5 - UNDELIV
6 - ACCEPTD
7 - UNKNOWN
8 - REJECTD
9 - FAILED
client_ref – custom parameter up to 160 characters, will be present in response for Single creation, DLR to Webhook, and callback
timestamp – time of sending message
parts_count – the amount of PDUs in the message
price – the cost of single message
parts – information about every PDU, may have such fields:
pdu_id – ID of the message part
encoding – text encoding used for the message part
content – text of the message part
status DLR status code for the message part
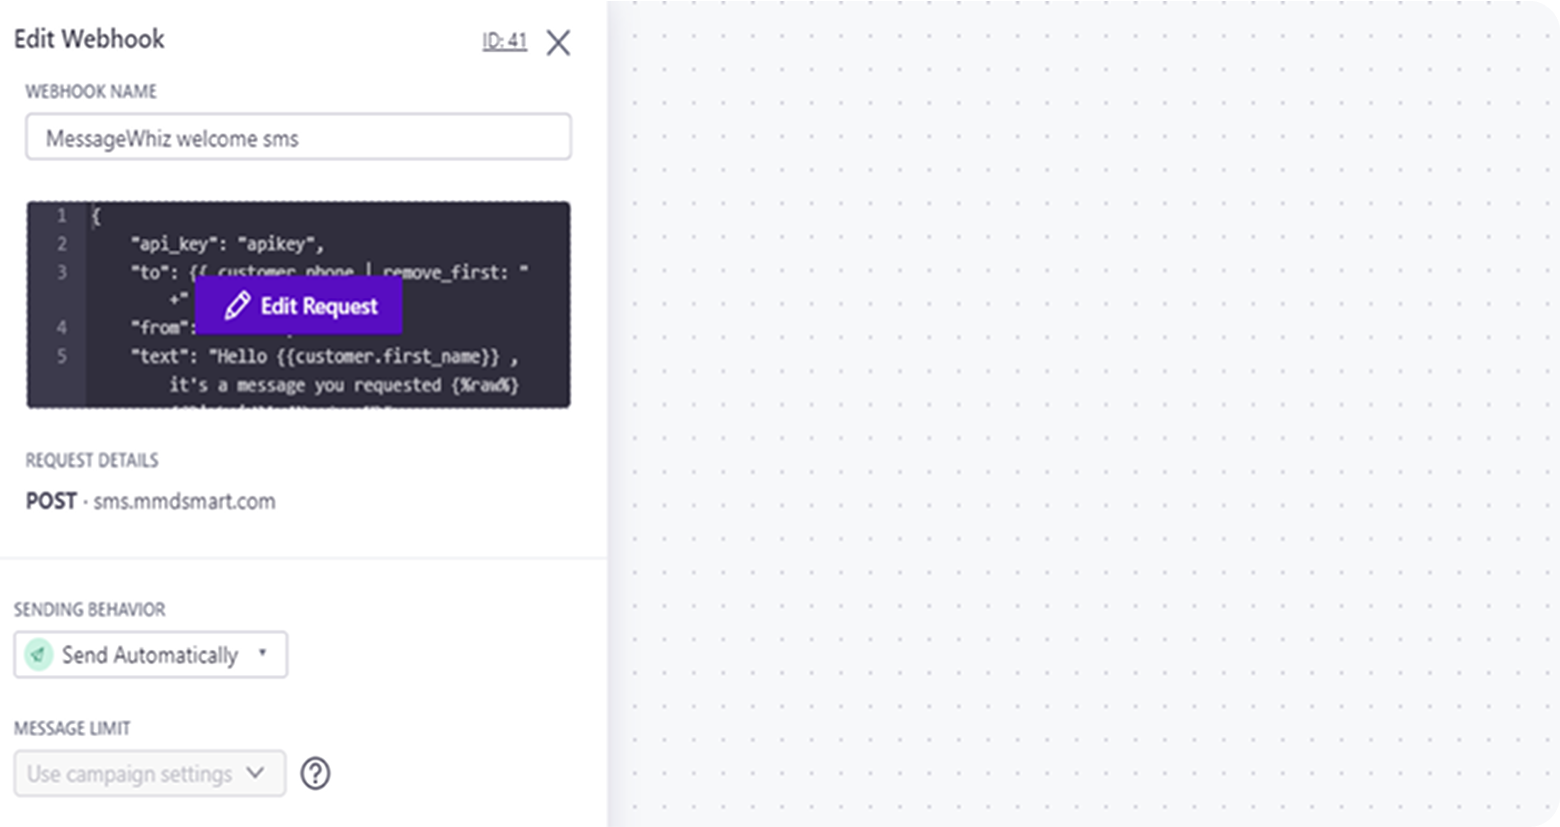
9. Click Save Changes and Done.
10. Set the Sending Behavior to Send Automatically. Click Save.
![s1img7-1600](/wp-content/themes/messagewhiz/images/page-instruction_using/s1img7-1600.png)
11. Click Next and set all the following parameters you have defined.
Congratulations, you have created a new campaign that sends an SMS to every new sign up!
Step 2
Step Two: Create an Automated Broadcast Message
MessageWhiz enables you to automate sending a broadcast message that is triggered by an API to large groups of people.
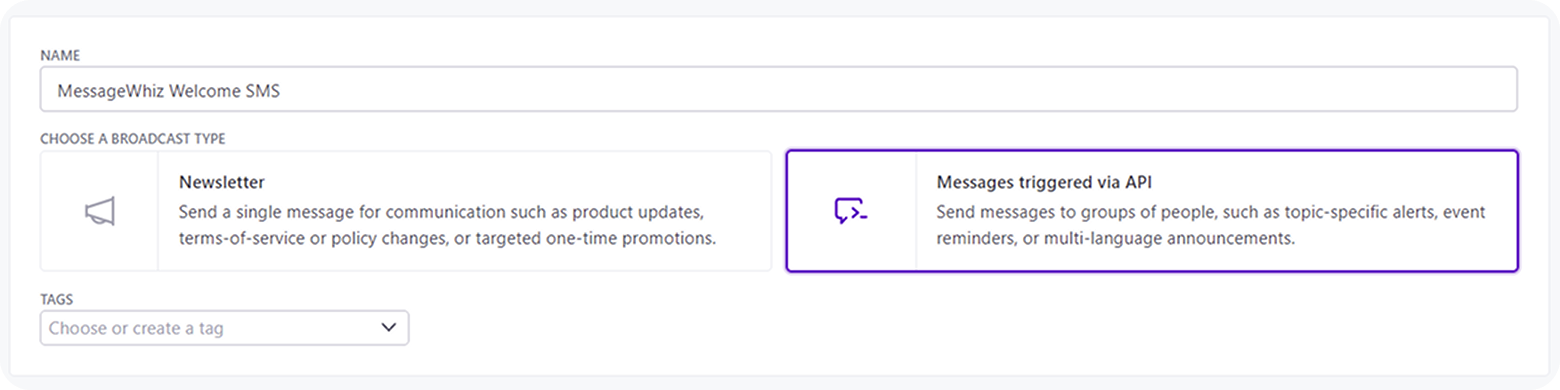
1. Enter a broadcast name, select the Messages triggered via API type and click Create Broadcast.
![s2img1-1600](/wp-content/themes/messagewhiz/images/page-instruction_using/s2img1-1600.png)
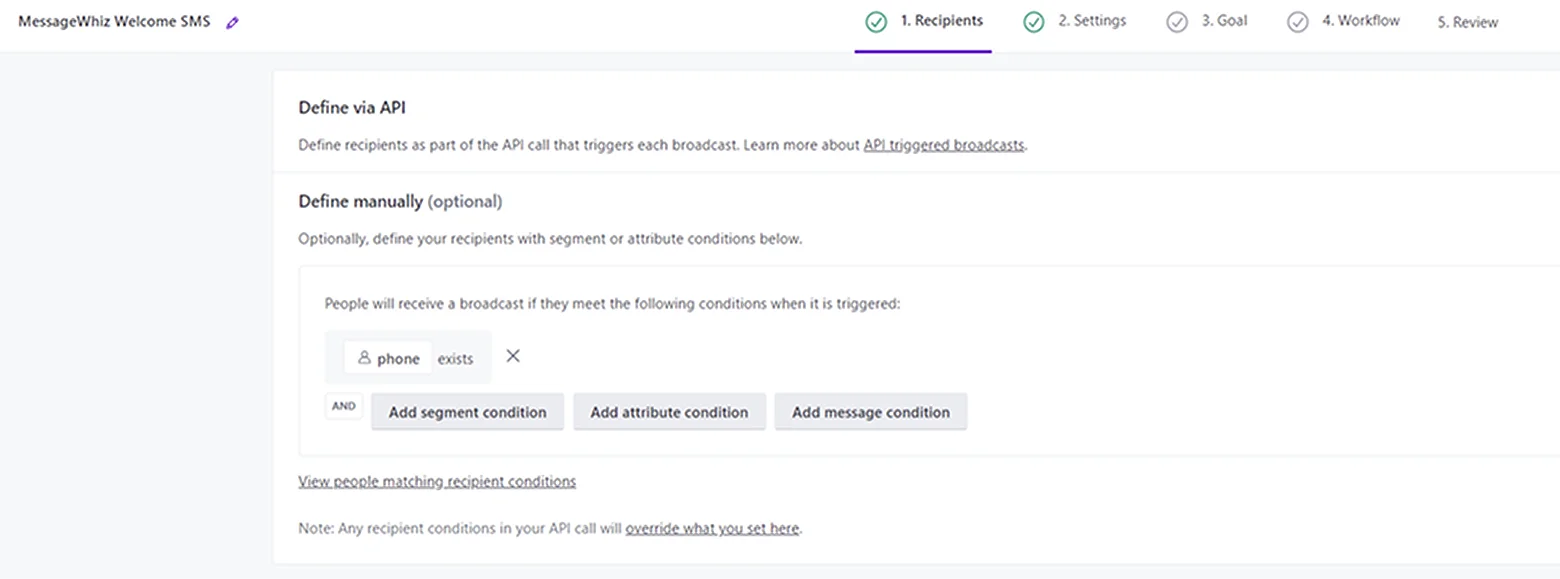
2. Under the Define manually section, click Add attribute condition, type in a phone, select exists, and click the checkmark button. Click Save & Next.
![s2img2-1600](/wp-content/themes/messagewhiz/images/page-instruction_using/s2img2-1600.png)
3. Choose the “Send and receive data” and drag it to the middle of your workflow.
![s1img3-1600](/wp-content/themes/messagewhiz/images/page-instruction_using/s1img3-1600.png)
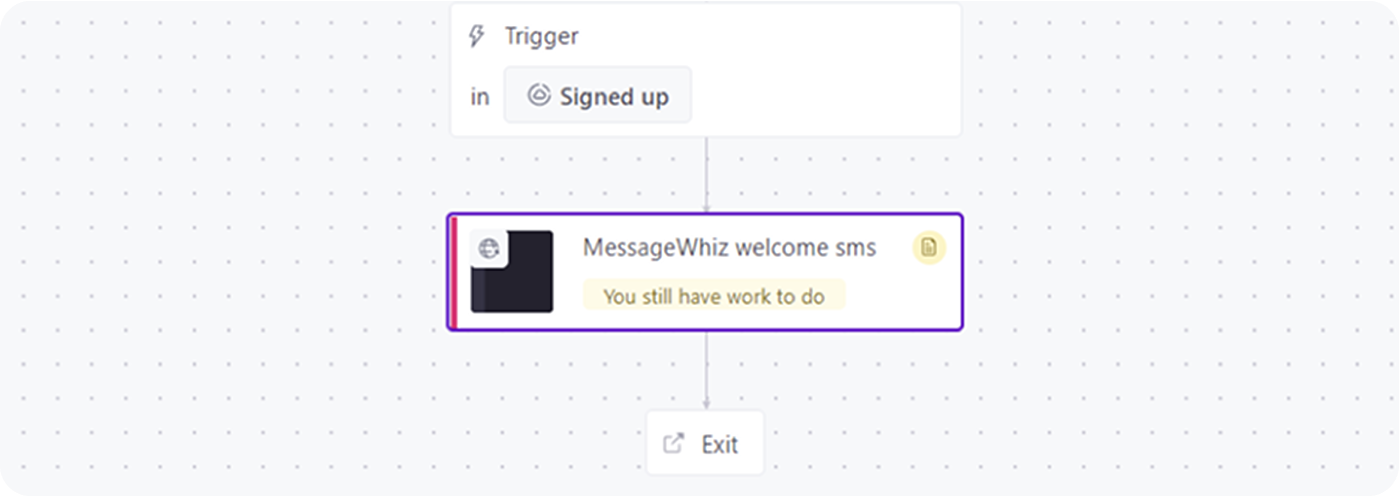
4. Select the dropped block.
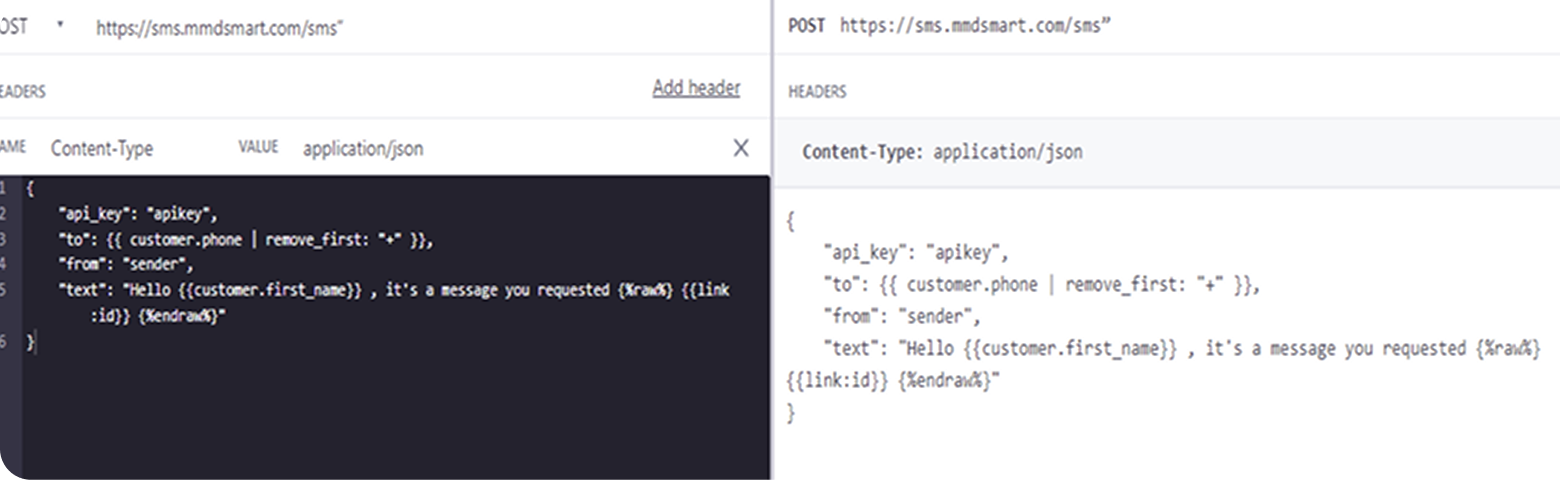
5. Click Add Request.
Set the method to POST
URL to “https://sms.mmdsmart.com/sms”
Keep the header Content type – application JSON.
Set the body to one of the following JSON:
In case if you are using MessageWhiz’s shorten_url feature, use the following request:
{ "api_key": "apikey", "to": “{{ customer.phone | remove_first: "+" }}”, "from": "sender", "text": "Hello {{customer.first_name}} , it's a message you requested {%raw%} {{link:id}} {%endraw%}" }
{
"api_key": "apikey",
"to": “{{ customer.phone | remove_first: "+" }}”,
"from": "sender",
"text": "Hello {{customer.first_name}} , it's a
message you requested {%raw%} {{link:id}} {%endraw%}"
}
Copy codeIf you don’t need the shorten_url feature, please use the following request:
{ "api_key": "apikey", "to": “{{ customer.phone | remove_first: "+" }}”, "from": "sender", "text": "Hello {{customer.first_name}} , it's a message you requested" }
{
"api_key": "apikey",
"to": “{{ customer.phone | remove_first: "+" }}”,
"from": "sender",
"text": "Hello {{customer.first_name}} , it's a
message you requested"
}
Copy codeThere are some optional parameters which may be included into request, such as :
client_ref - custom parameter up to 160 characters, will be present in response for Single creation, DLR to Webhook and callback
callback - the URL of callback to which DLR statuses per single message will be sent
Callback will contain the following parameters:
message_id – the ID of the message
sender – the Sender name that was used in message
recipient – phone number of the recipient
content – text of the message that the recipient received
state – the ID of DLR status of message
status - the DLR status of single message. Possible DLR statuses (with their ids):
1 - ENROUTE
2 -DELIVRD
3 - EXPIRED
4 - DELETED
5 - UNDELIV
6 - ACCEPTD
7 - UNKNOWN
8 - REJECTD
9 - FAILED
6. Click Save Changes and Done.
![s1img5-1600](/wp-content/themes/messagewhiz/images/page-instruction_using/s1img5-1600.png)
7. Set the Sending behavior to Send Automatically. Click Save.
![s1img5-1600](/wp-content/themes/messagewhiz/images/page-instruction_using/s1img7-1600.png)
Step 3
Step Three: Try it out!
8. Click Next.
9. Click Activate Broadcast.
Congratulations, you have created a new broadcast workflow that sends an SMS to all customers with a mobile number.